
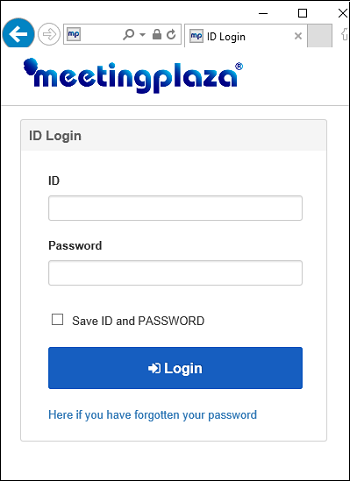
To create a new MeetingPlaza conference room, user needs to log into a system called "Conference Administrator System".
Most used features are included in
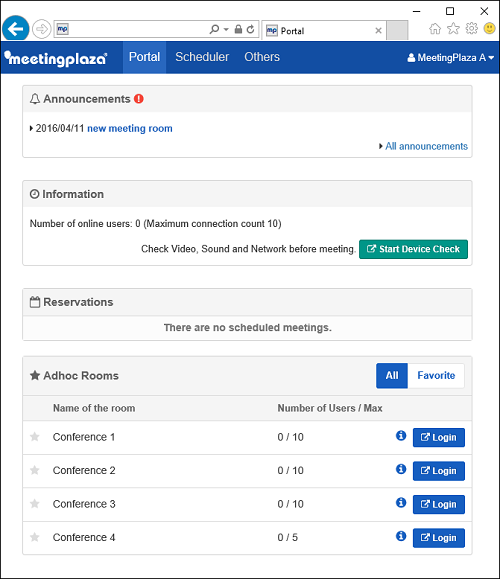
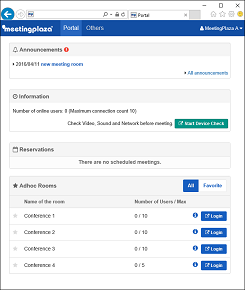
On main page, most useful features of Conference Administrator System are listed.
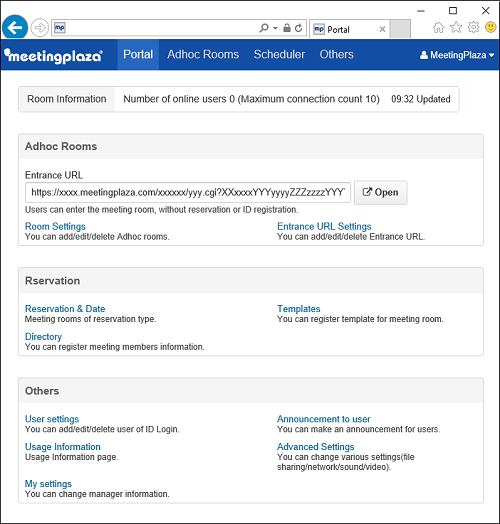
Room Information
Number of current users are displayed
Adhoc Rooms
Conference Scheduler
Others
Adhoc room is a type of room doesn't require user registration in advance. There are two ways to log into an Adhoc room.
Below, are descriptions on how to setup Adhoc rooms, setup entrance URL and how to monitor Adhoc room usage history.
Adhoc room is previously known as "TeamRoom" under MeetingPlaza V6.1.
Our old TeamRoom doesn't support multiple rooms. Under this new version, a user may create multiple Adhoc rooms.
At initial user login, there are three preset Adhoc rooms are available.

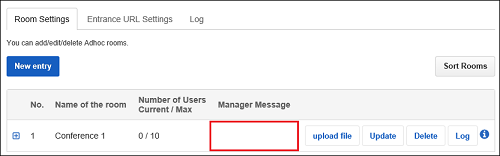
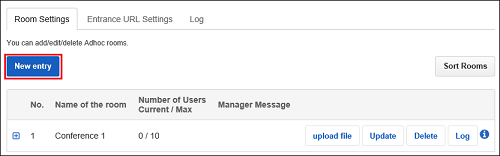
User can create, modify or delete Adhoc Rooms under the room settings.
The messages saved inside of manager message folder are displayed on the top page as well as displayed under the message section for administrators.
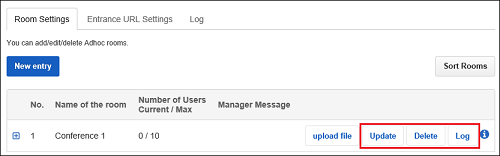
By clicking < Update > besides the conference room name, user may change room settings.
By clicking < Delete >, conference room is deleted.
By clicking < Log >, room usage history is displayed.
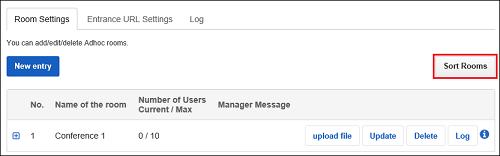
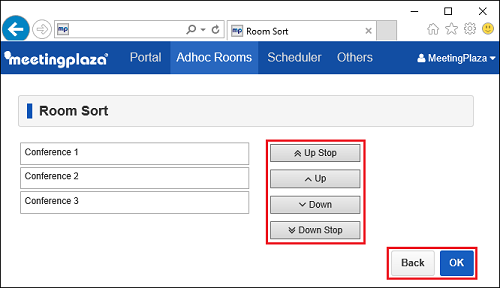
Conference rooms are displayed from top in the order of high priority to low priority.
To change a room priority, choose <Sort Rooms>
.
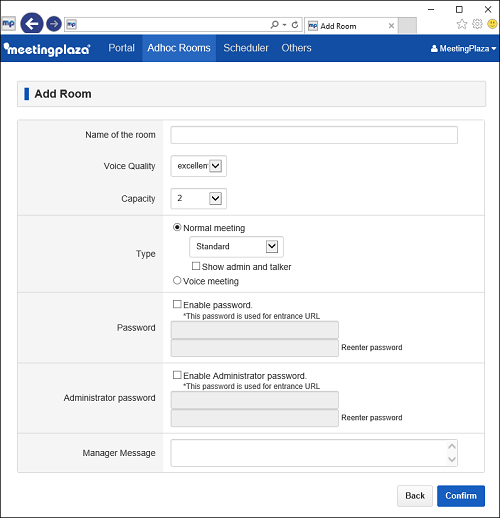
| Name of the room |
Enter conference room name. Must have items. |
|---|---|
| Voice Quality |
choose conference room audio quality. Normal tone quality is equivalent to a normal cellular phone. Clearer quality can be obtained by selecting either < good > or < excellent >. Attention: When there is a participant who is on a network (for instance, modem line and ISDN line) where the speed is slow because of the volume of data then set the tone quality as good. |
| Capacity | Enter the maximum number of participants for a conference room. |
| Type |
To choose conference screen components. There are multiple screen types to choose from. Please check the image examples carefully. (Choose each screen and an image example shows.) A user chooses [Show video of administrator and talker] to limit video activities to these two parties. |
| Password |
|
| Administrator password |
|
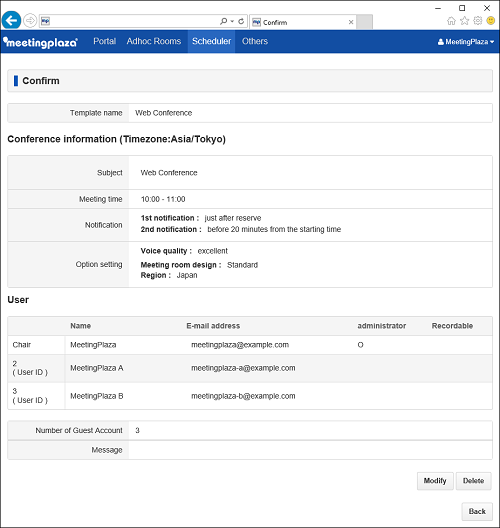
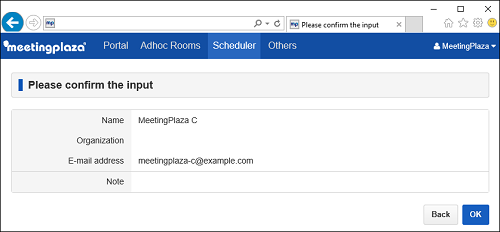
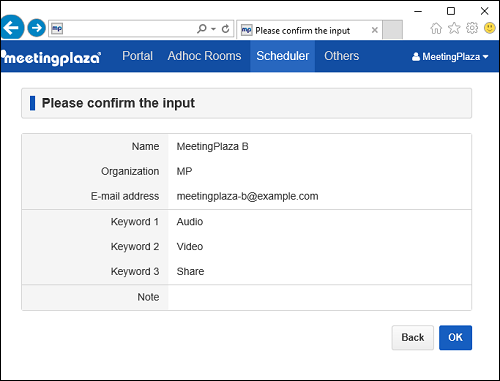
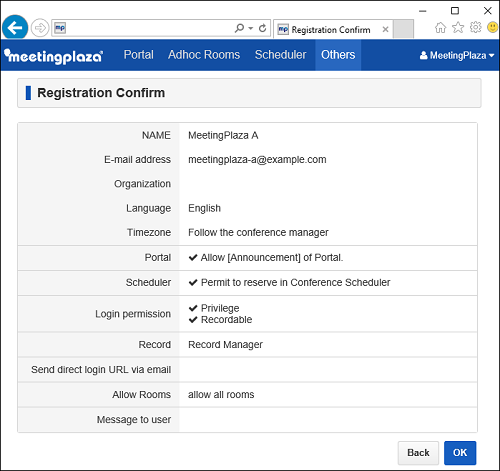
 to check new conference room registration details.
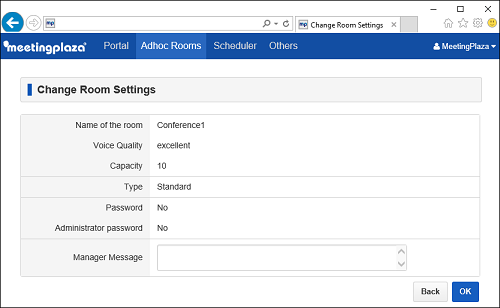
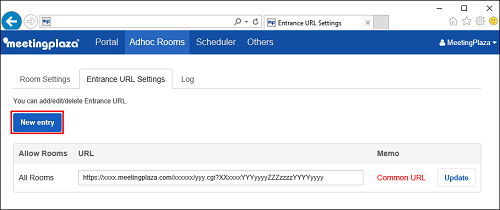
Choose an Adhoc room to create an entrance URL.
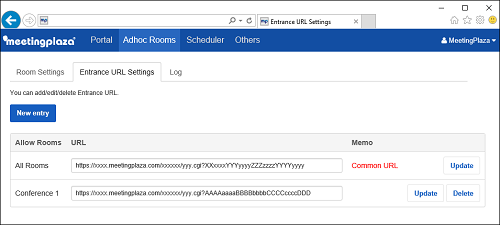
By clicking < UPDATE >, user may change entrance URL.
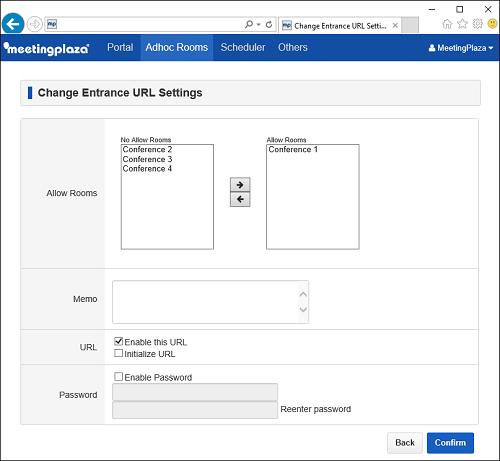
A user may choose < Allow Rooms >, enable/disable entrance URL, Update entrance URL, set password for an entrance URL.
By clicking < DELETE >, user may delete entrance URL.
Common URL is unable to delete.
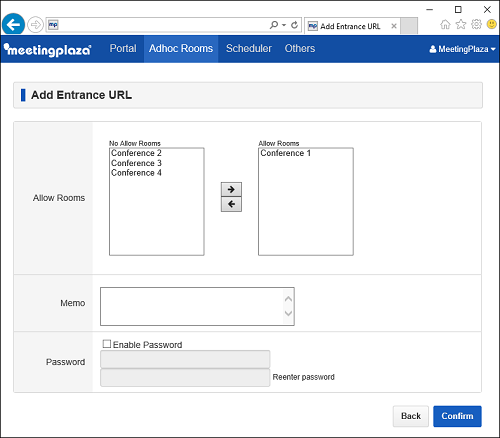
| Allow Rooms | Choose an attendable Adhoc room. |
|---|---|
| Memo | Entered details are displayed in Entrance URL Settings Memo section. |
| Password | By checking on this option |
to check new entrance URL registration details.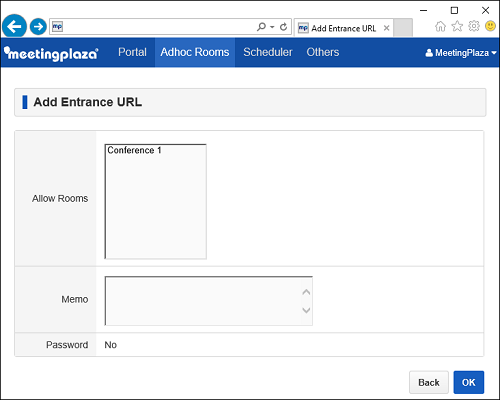
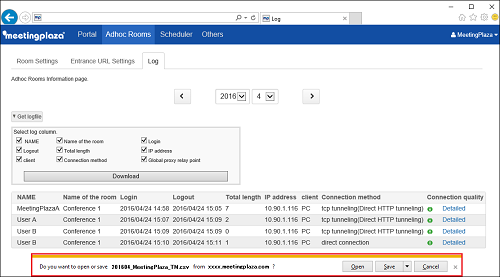
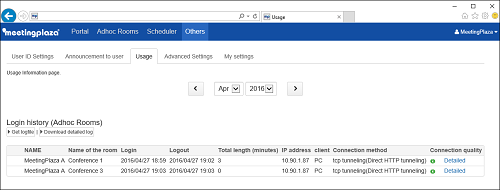
To check Adhoc room usage history.
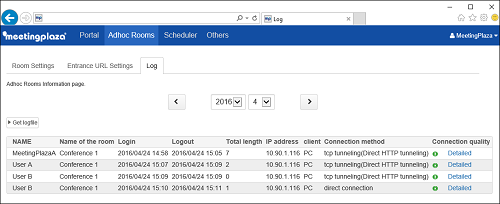
Past user data including user names, room names, login time, logout time, IP address, total length, client, connection method and connection quality are grouped per month.
Deleted users data are included as long as the usage was valid for the month(s).
To move from month to month, click [<] or [>].
(This is a confirmation pop-up message after user clicks [Get logfile].)
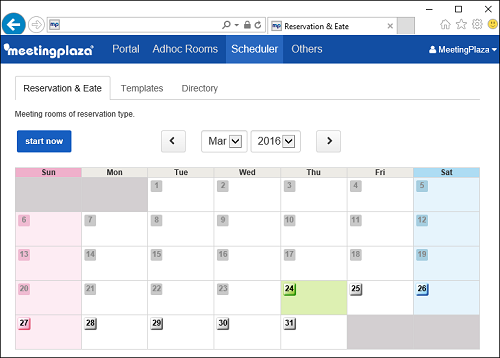
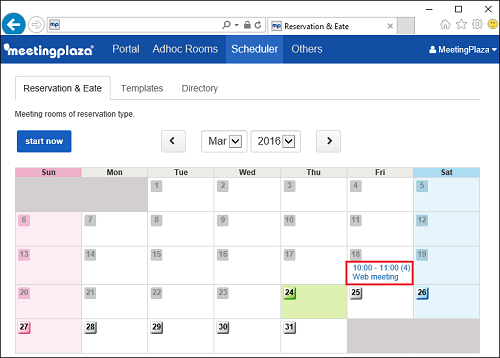
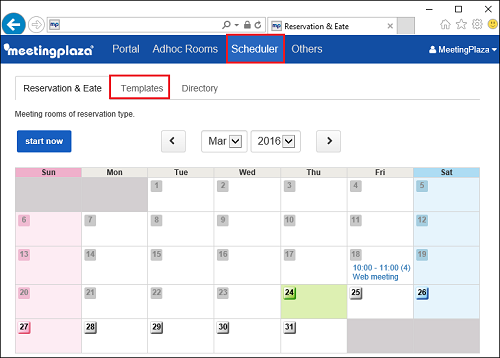
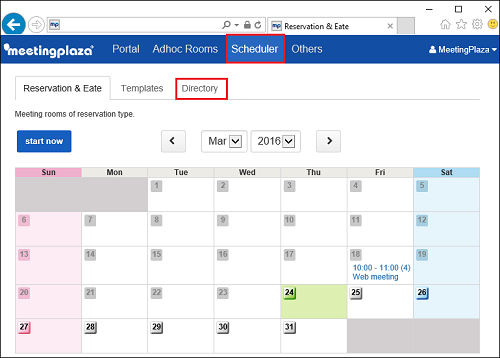
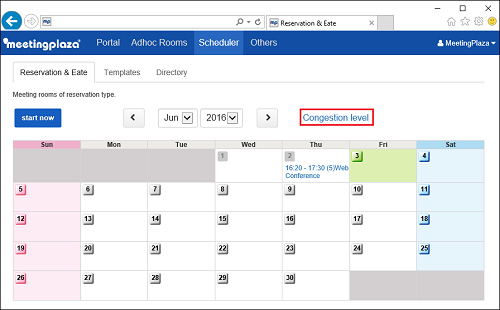
The type of conference room that requires reservation and participant registration in advance. Numbers that inside of () in calendar shows the number of participants to the meeting.
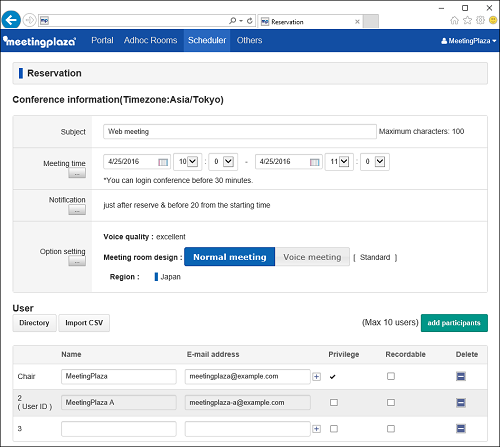
This chapter explains a few handy features in conference room reservation.
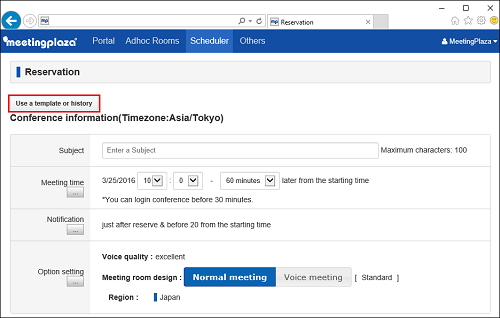
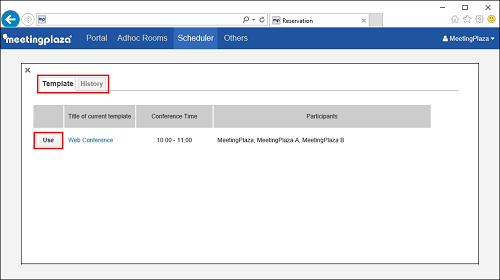
User may reserve a conference from a registered template or based on past conference history. For how to register a new template, please refer to 8-3-5.
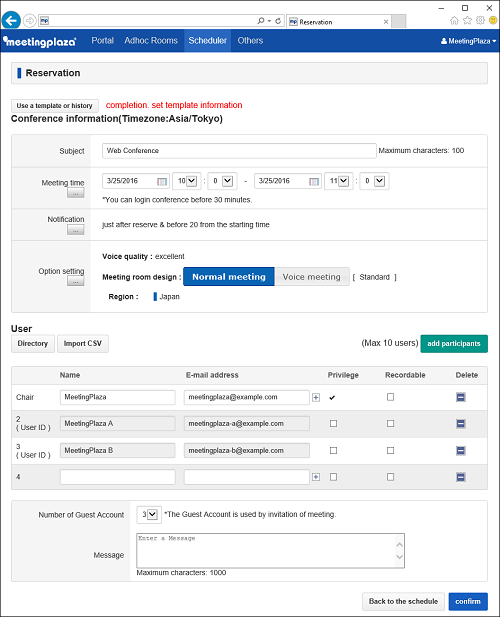
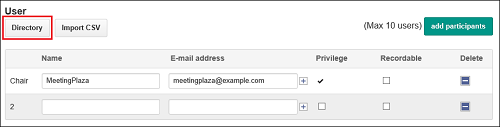
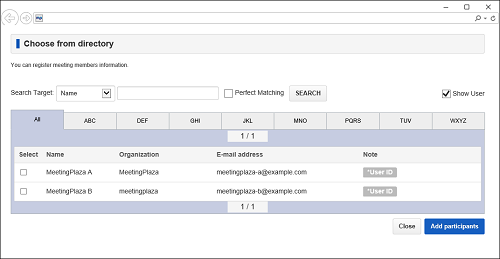
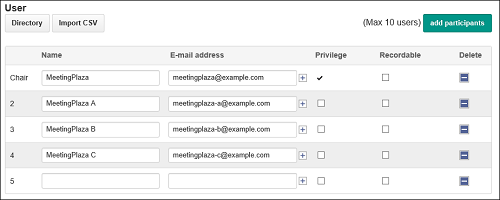
User may choose participants from directory and registered user information. For how to add to a directory, please refer to 8-3-8. For how to register a new user, please refer to 8-5-2.

By using CSV file, you may enter all participants' information in one transaction.
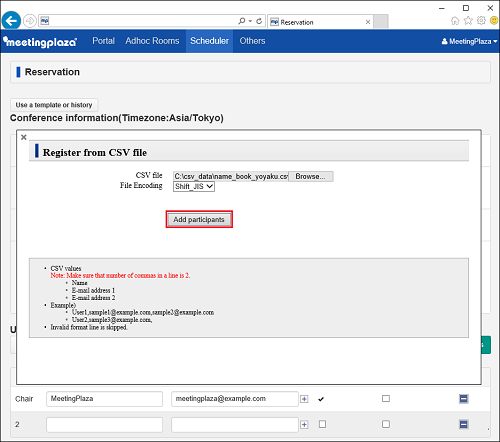
Inside the CSV file, for each row, starting from left, use "," (comma) to separate following fields.
Name
E-mail Address 1
E-mail Address 2
The number of comma is two.
Ex) User1,sample1@example.com,sample2@example.com
(While there is an email address 2)
User2,sample3@example.com,
(While there is no email address 2)
Past reservation information is stored in the database of conference administrator system. Administrator may check past reservation info at any time. Furthermore, administrator may apply previous reservation information (reuse) on a new conference.
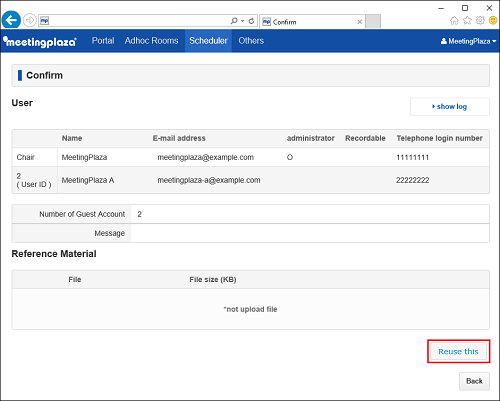
This feature allows user to do simplify reservation process occurs regularly. By utilizing this feature, user saves time on reservation the same as <Reuse This> feature does.
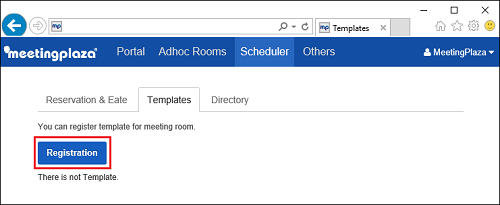
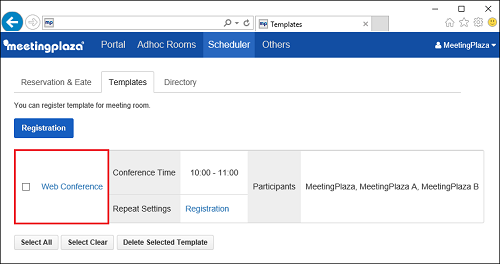
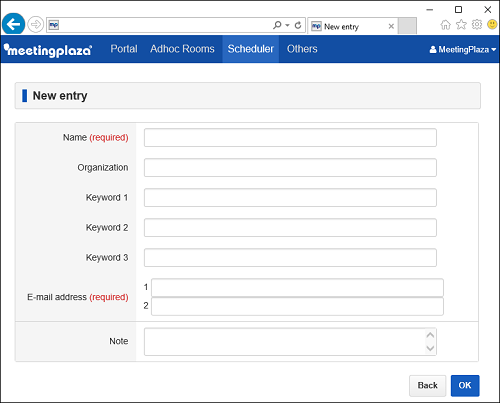
conference reservation template registration screen is displayed. <Template Name> is a required item. Other items are much the same as conference reservation. Please fill out required.

Log into the conference scheduler and click on the template option in the upper part of the screen.
Choose Modify or Delete.
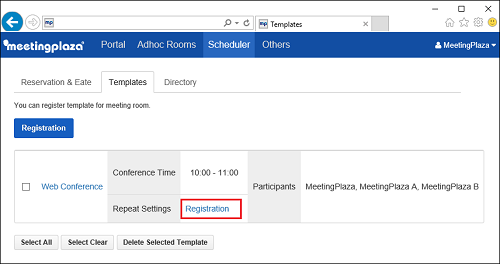
By using saved template, user may choose to repeatedly schedule the same meetings weekly or monthly.
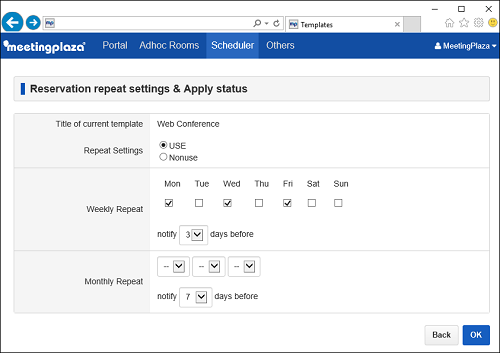
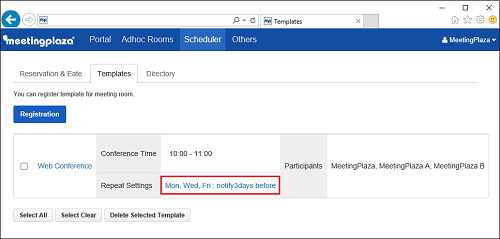
Timing in which the template is reflected in an actual conference reservation is either 0:00 on the day when "Notify before the day of X" is done or 6:00 or 12:00 or 18:00.
When reflecting it, the confirmation mail of the conference reservation is transmitted to the organizer and the conference room manager.
"Notification date" is set in the time of 20 minutes adding automatically at that time, and the mail of the conference guide is transmitted to the participant at the time.
The reflection is done before a day of N day when the convenience at the registration date of the reservation is not useful for the reflection before the day of N repeatedly
By saving participants' names and email addresses in advance, a handy feature allows the user to select or paste from directory when creating participant list. This feature saves time for conference host when the same participant(s) attend the conferences repeatedly.
There are two types of directories.
Common directory includes registered users, and participants added to the directory.
Keyword type directory allows keyword entry at user registration. A user may select participants for a conference by typing keyword.
To switch between two directories, choose <Others> - < My settings >.

Participant's name and E-mail address can be placed in the directory, This directory can be used during the reservation process.
User may enter the address book via CSV file.
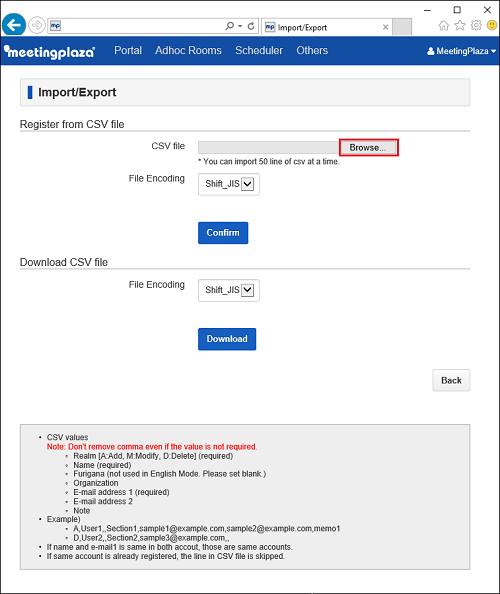
Inside the CSV file, for each row, starting from left, use "," (comma) to separate following fields.
Name (required)
Furigana (not used in English Mode. Please set blank.)
Organization
E-mail address 1 (required)
E-mail address 2
Note
The number of comma is four.
Ex) User1,,Section1,sample1@example.com,sample2@example.com,memo1
User2,,Section2,sample3@example.com,,
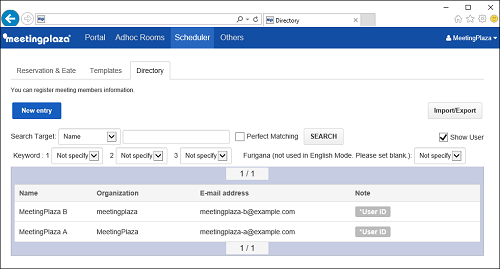
If a large amount of data is registered because the address book that has been explained up to now doesn't have the layered structure, the retrieval becomes inconvenient. For that case, if "Key word type address book" explains in the following is used, it becomes convenient.
To use a keyword type directory, Click < Others > - [[My settings], Put the checkbox ![]() of [Use keyword type] on
of [Use keyword type] on ![]() .
.

The following is how to register a keyword type directory.
"Key word 1" etc. input on this screen become menus when the address book is retrieved.
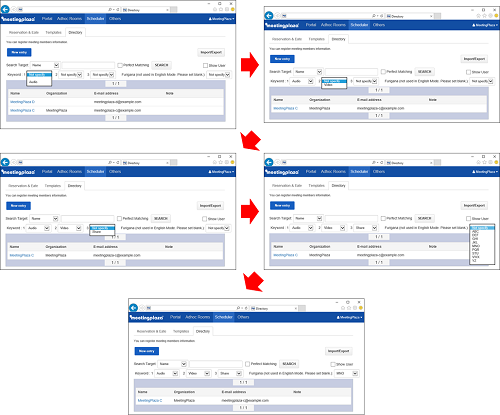
For uers purchased our system package, keyword typed address book is unable to import from CSV file.
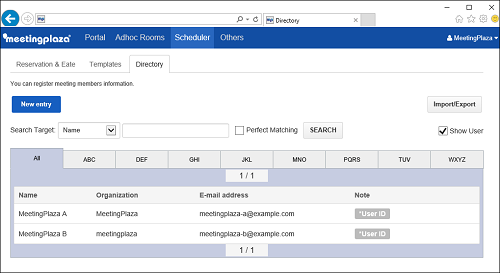
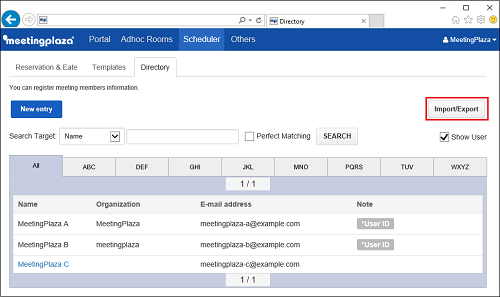
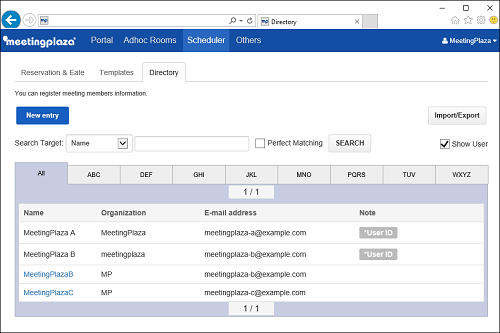
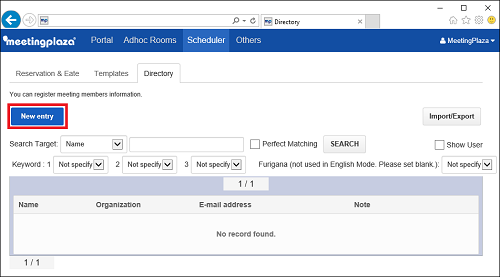
Choose < Scheduler> - <Directory>.
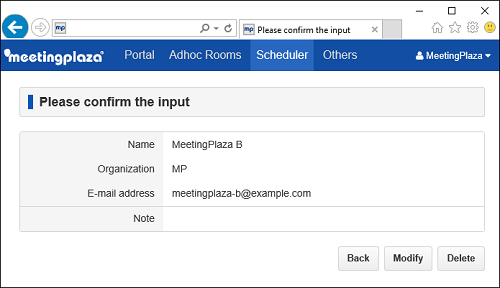
Choose data that needs to be changed or deleted.
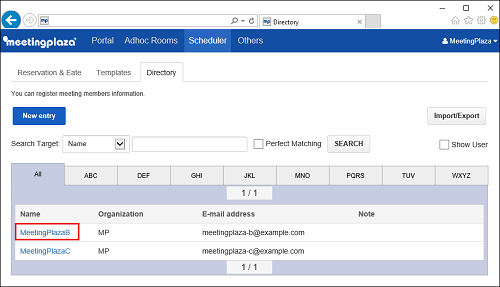
Click on the entry that needs to be changed. Click on modify to make changes or click on delete to remove the entry.
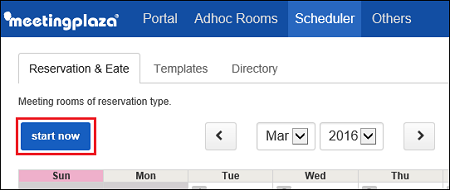
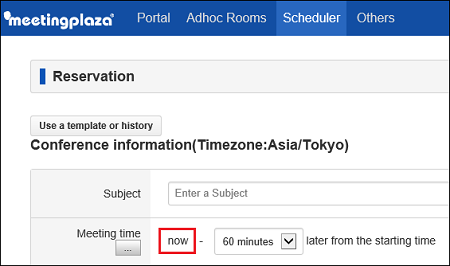
Select the calendar at the top left of the screen [Start now] or click in the conference information input screen select "Start" to the [Start now] the meeting will begin immediately.
Screen Calendar
Conference Information
At menu < Congestion Level >, you may verify the connection quantity of servers.
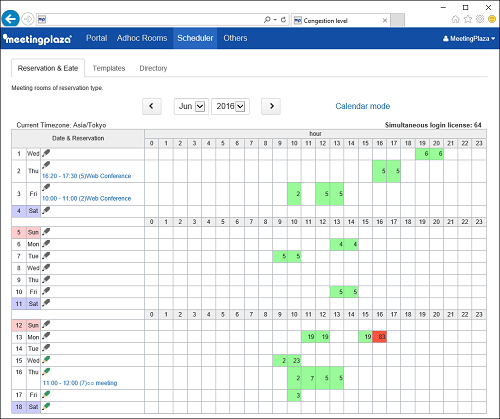
The number in the frame shows the number of concurrent connections in this time scale.
The color shows the volume of bookings taken place.
Green is 50% less than 50% to 79% yellow, orange is 80% and 99%, which means 100% red.
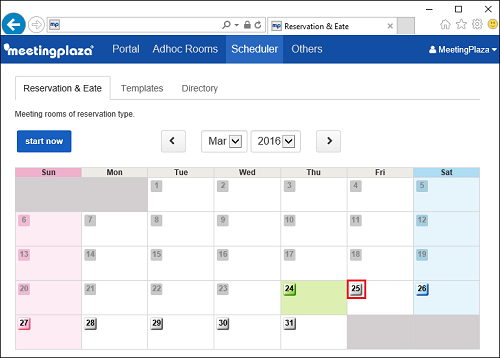
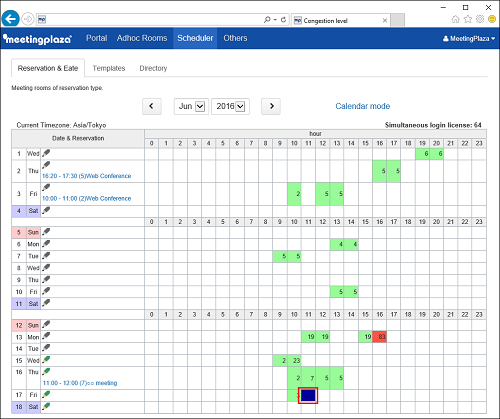
Click on a conference start date to view any information for the conference.
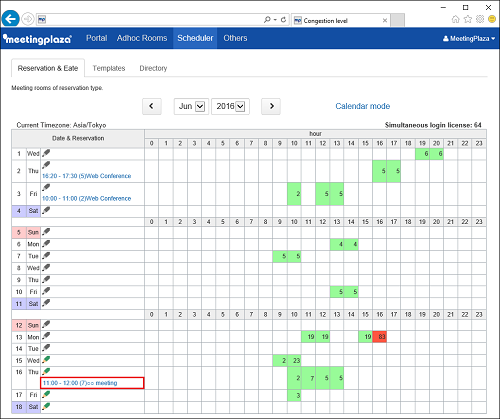
When you click on the time to hold a meeting, the meeting can make a reservation.
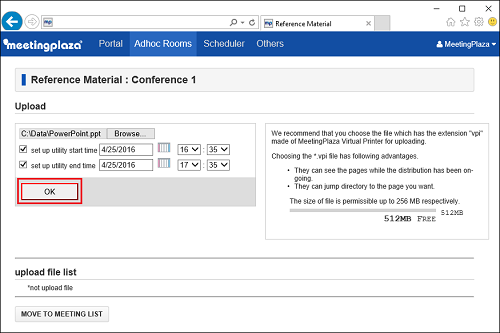
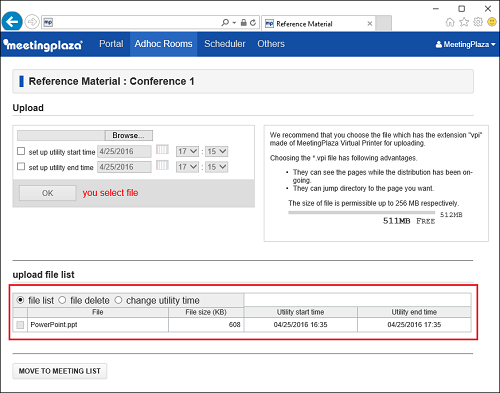
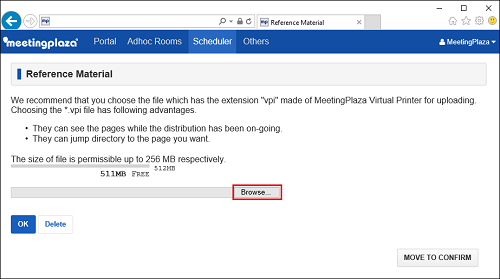
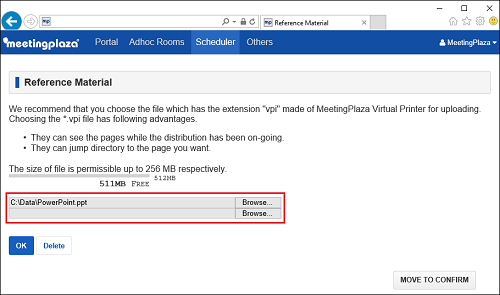
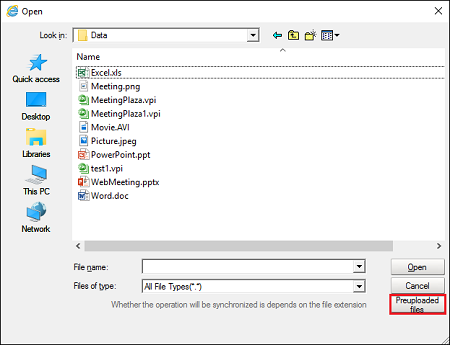
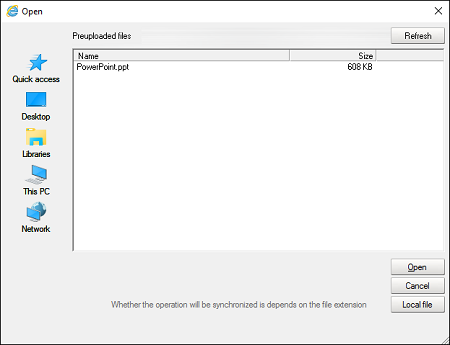
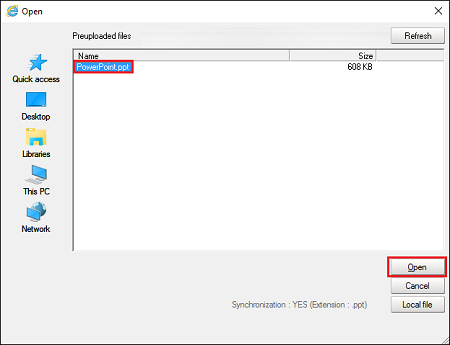
Before the conference starts, user may upload files that will be shared in the conference to server in advance, from either an Adhoc room or a reserved conference room.
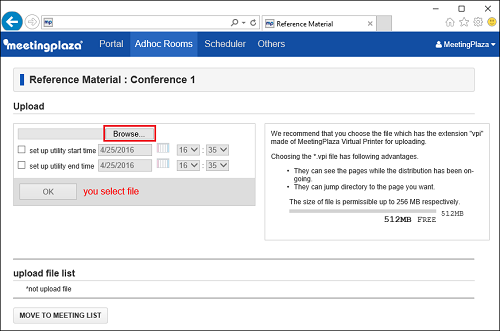
The up-loaded file recommends the "VPI" form.
There is the following advantages when the VPI file is used.
Below, are restrictions applied to each room administrator.
The upper bound of the size of the file is 256MB a file.
12 is the maximum number of files that can be uploaded at once.
A total of 32 total files can be uploaded.
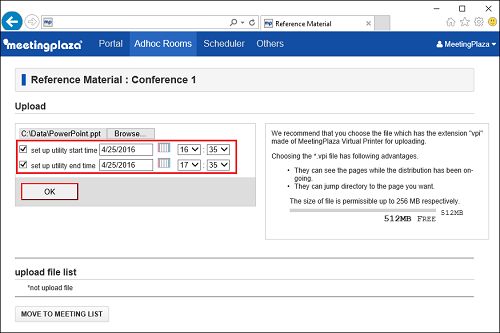
A prior update can be done at any time while holding the conference.
Attention:
It is only a conference organizer that can share the file that up-loads prior.
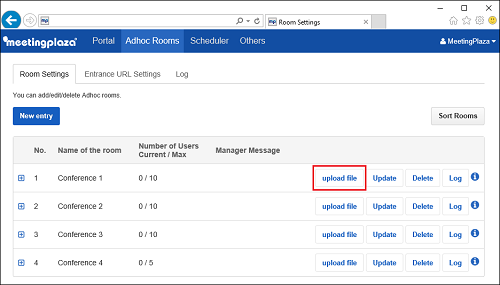
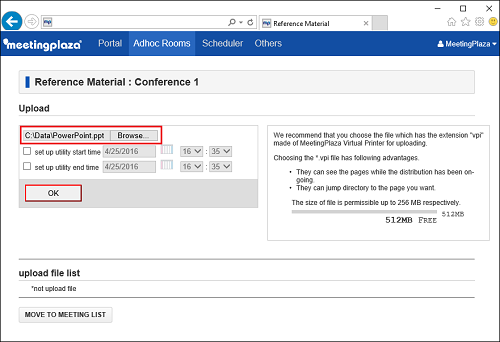
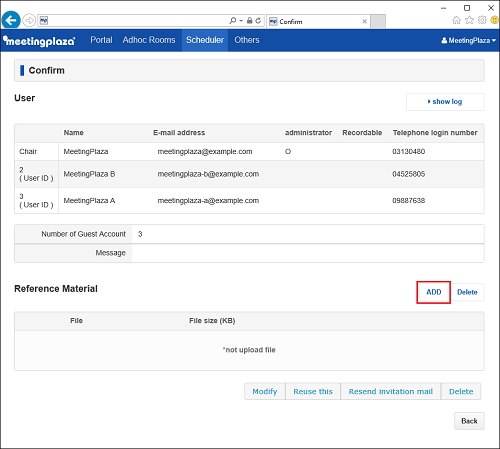
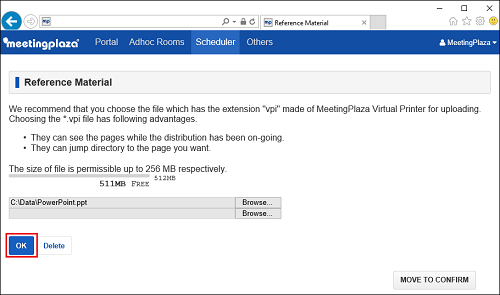
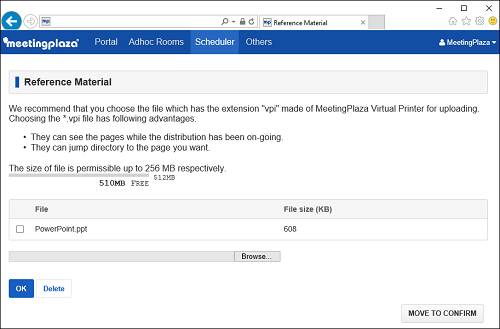
User may also upload a file to a reversed conference room on the reservation confirmation page.
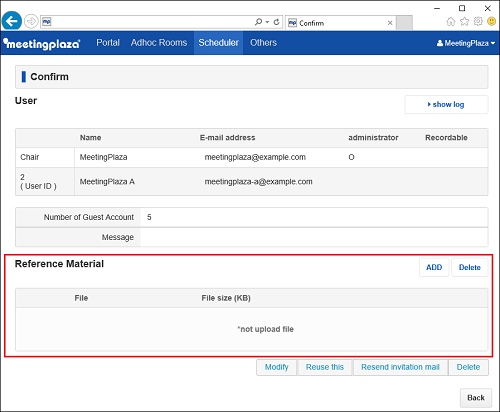
Below, are how to upload a file for a reserved conference room.
This chapter describes features of < Others >.

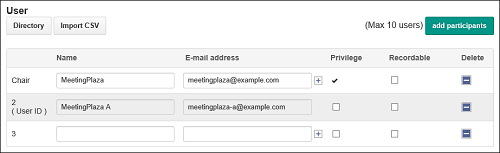
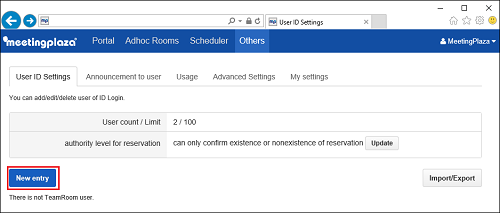
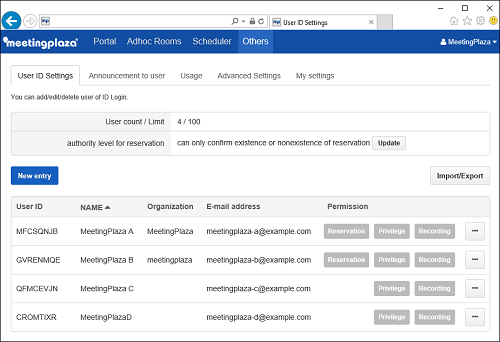
Registered users are a type of users who are enrolled and authorized by conference room administrator and may reserve and join a conference.
A conference room administrator is able to register, change, suspend or remove registered users at this admin page.
A conference room administrator also decides the accessible levels of non-registered users, such as what room settings can they see or what features they can make changes to.
There is a cap for maximum number of registered users. For ASP service subscribers, the number of accounts is limited to 10 times the maximum of simultaneous login licenses per entire system. For the system-sales customers, the number of registered user accounts is up to 8 times of the maximum of simultaneous logins.
Ex)
For ASP service subscribers, if the maximum of simultaneous login licenses is 10, then the number of accounts is up to 100.
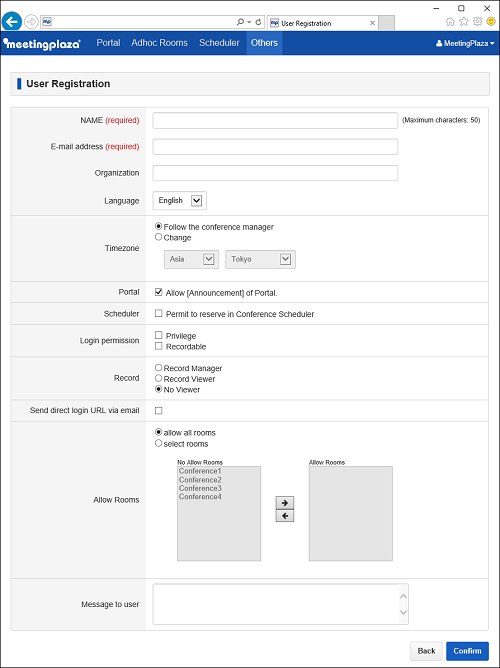
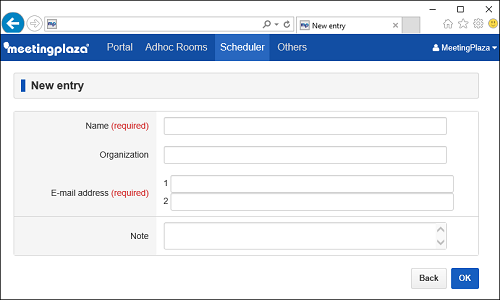
| NAME (required) | Enter user name. |
|---|---|
| E-mail address (required) | Enter user email address. |
| Organization | Enter user's organization |
| Language | Choose display language when login to the conference room |
| TimeZone | TimeZone option is enabled. |
|
Portal (Allow [Announcement] of Portal.) |
Turn |
|
Portal (Allow [No specified mode] reservation.) |
Turn (* Only available when the setting of conference room manager is set to "registered users only mode") |
| Scheduler | Put the box |
|
Login permission (Recordable) |
By checking on this option |
|
Login permission (Recordable) |
Check on the box |
| Send direct login URL via email |
Put |
| Allow Rooms | Choose from [allow all rooms] or [select rooms]. |
| Message to user | Enter message body here if you want to send a specific message to the user at emailing meeting invitation. |
Your ACCOUNT: XXXXXXXX
Your PASSWORD: XXXXXXXX
http://xxxxxxxx.xxxx/teammgr/index.cgi
| Users that are authorized to reserve a meeting. | Users that are unauthorized to reserve a meeting. |
|---|---|
 |
 |
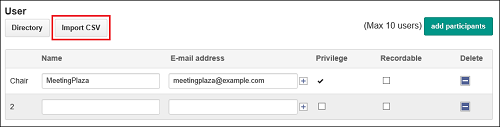
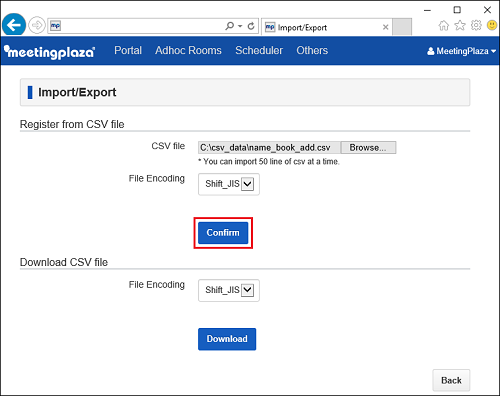
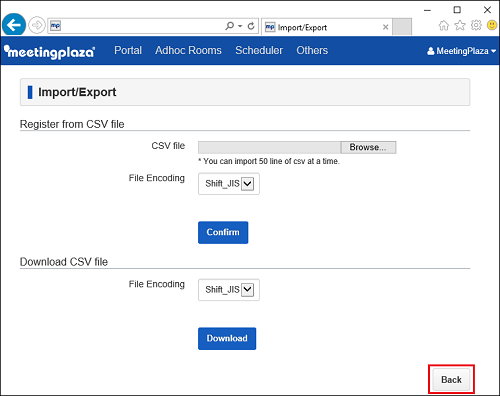
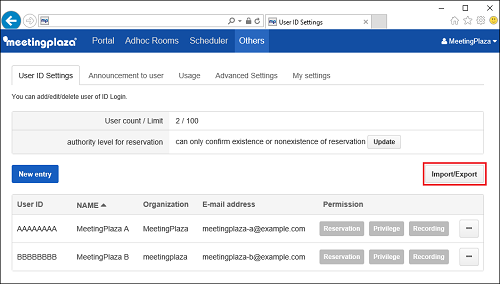
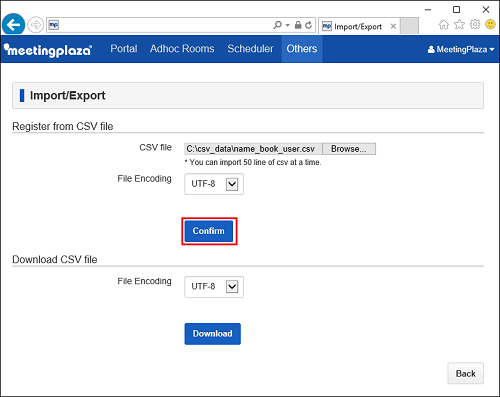
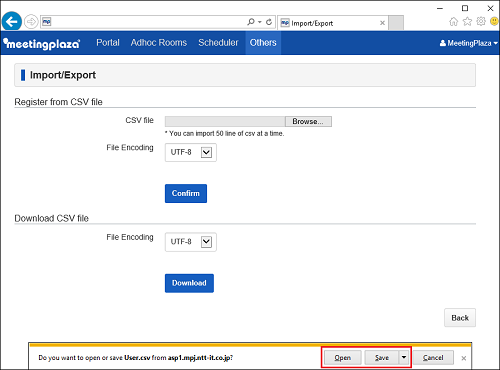
Click <Import/Export> displayed in <Others> - <User ID Settings>.
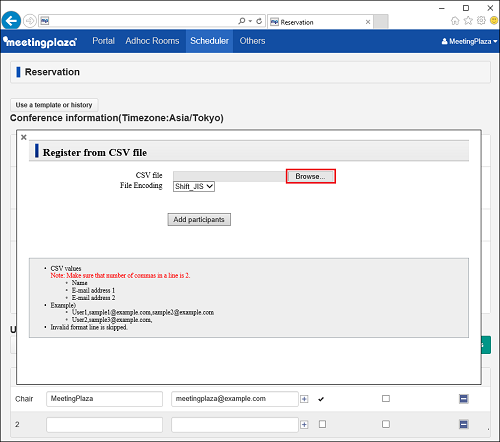
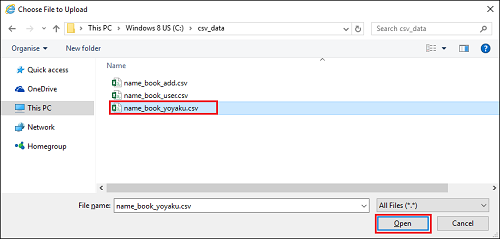
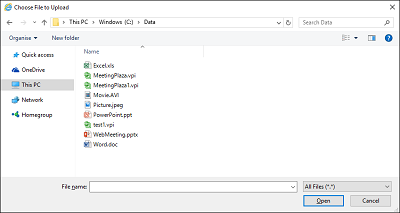
Click [Browse] in the [CSV files].
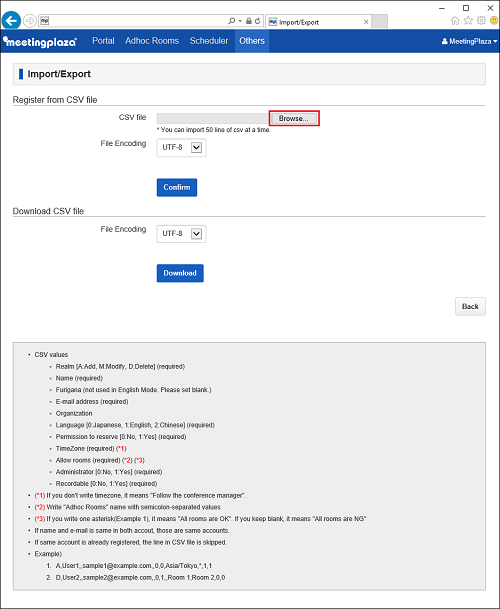
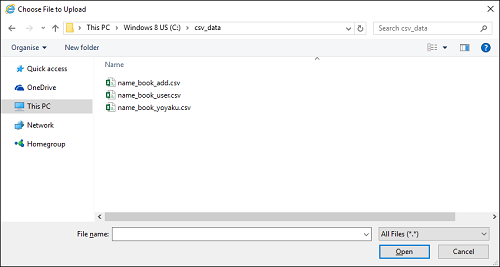
To choose a file to upload.
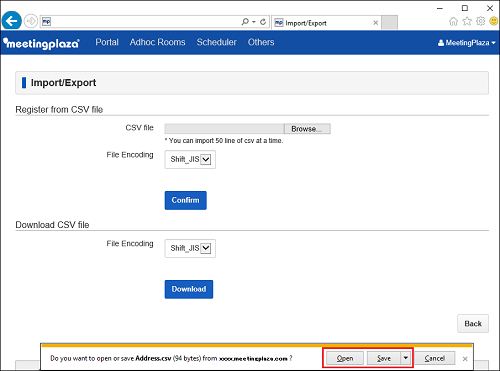
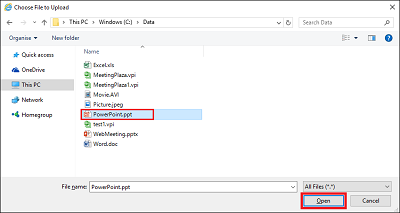
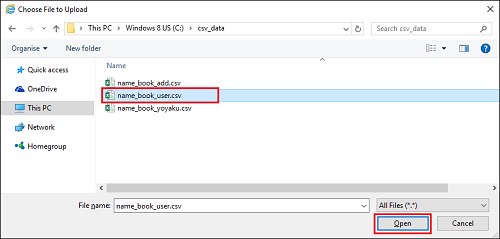
Choose a file and click [Open].
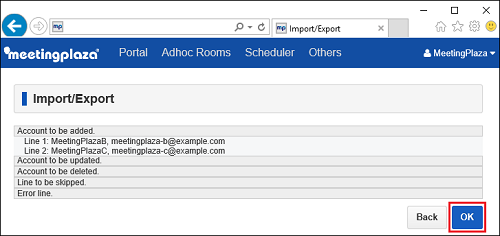
Your uploaded CSV file is displayed at [CSV files]. Click [Confirm].
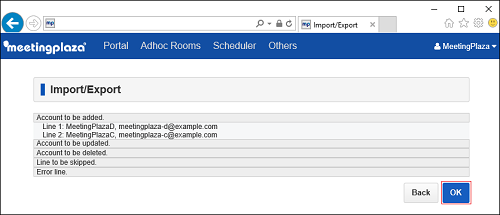
Check your added account, click [OK] to proceed.
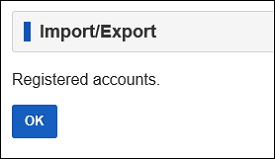
A completed screen is displayed.
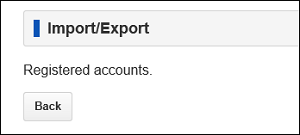
By clicking [Back], imported content will be displayed in User ID Settings screen.

Click < Suspend >, the following confirmation page is displayed. Click ![]() to suspend the active account. (For users currently in the conference room, online session will be closed and users will be logged off.)
to suspend the active account. (For users currently in the conference room, online session will be closed and users will be logged off.)

For suspended users, a < Validate > is displayed besides their names in the User ID Settings user list. To reactivate the account, please click < Validate >.

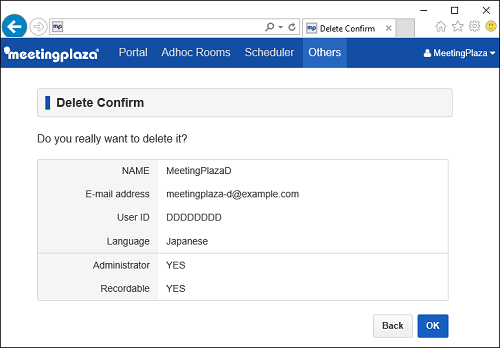
The following confirmation screens is displayed when deletion ![]() is clicked. (For users currently in the conference room, online session will be closed and users will be logged off.)
is clicked. (For users currently in the conference room, online session will be closed and users will be logged off.)
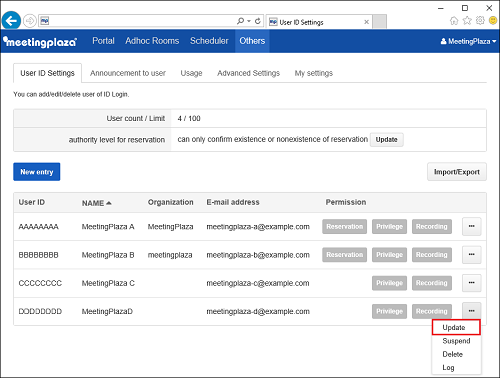
Click <Usage> to view user's user name, conference room names, login date, logout date, length (minutes) by month. Click [Prev. Month] or [Next Month] to view different months.
An authorized registered user can view, update or delete the reservation made by other users. At this page, a conference room administrator can make operational policy of authorized users on what can be seen and what changes are allowed.
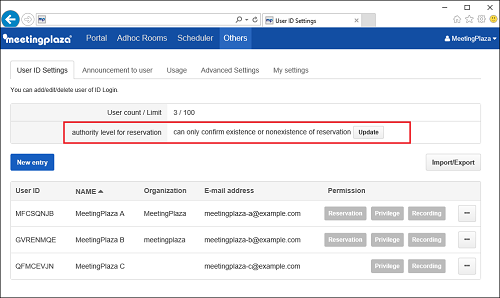
Click [Update] to display items that can be changed. Authorized users' reservation information will be updated according to the saved selection.

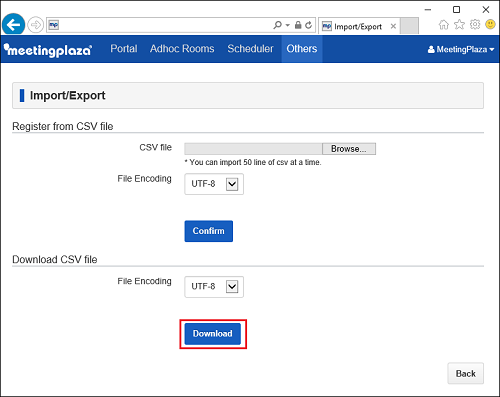
By choosing < Others > - <Usage>, user views the conference room usage history by month.
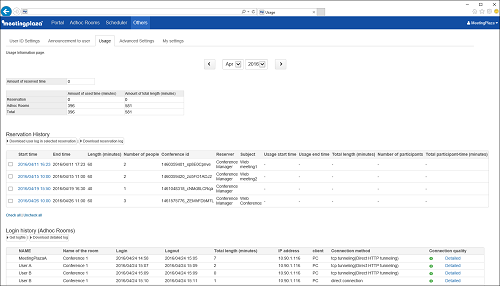
The use history this month is displayed. Please select the year and moth you wish to see. The following is a description of the fields.
The following is a description of the fields. The time unit is < minute >.
| Display in screen | Fields | |
|---|---|---|
| Basic use time | It is time that can be used within the range of the monthly basic charge of the contracted ASP service. | |
| Total of use time before it begins | The use time of the conference that has not been begun for that month | |
| Total of use time17 | It is total time for the month of the conferences scheduled and the use time for the team room | |
| Total of total use time18 | This is the total of all participants use time including scheduled conferences and the team room. | |
| Login history (reserved conference room) | ||
| Download user log in selected reservation |
Usage data of the selected reservation is available for download as csv file. Users can customize contents to view from usage history. Below, are the description of rows in the csv file (from left to right): NO.1: Conference ID NO.2: User Name NO.3: E-mail address NO.4: Usage start date and time NO.5: Usage end date and time NO.6: IP address NO.7: client NO.8: connection method |
|
| Download reservation log |
Reservation information data is available for download as csv file. Users can customize contents to view from usage history. Below, there are the description of rows in the csv file (from left to right): NO.1: Reservation start date and time NO.2: Reservation end date and time NO.3: reservation time NO.4: number of people for reservation NO.5: conference ID NO.6: subscriber NO.7: subject NO.8: Usage start date and time NO.9: Usage end date and time NO.10: conference duration NO.11: number of users NO.12: total use time * Please note that No. 1 - 7 are for reservation and No. 8 - 12 are for actual conference usage. |
|
| Reservation information | Beginning date | It is "Beginning date" specified when the conference room is reserved. |
| End date | It is "End date" specified when the conference room is reserved. | |
| Reservation time | It is time of "End date" - "Beginning date" of reservation information. | |
| Number of use | It is a number of participants for a scheduled conference | |
| Conference ID | It is an identification code of the conference room generated when the conference room is reserved. | |
| User name who reserved | The name that reserved the conference is displayed. | |
| Agenda | It is "Agenda" specified when the conference room is reserved. | |
| Use state | Agenda | It is a date that the first participant logged in. |
| End date | It is a date when the last participant logged out. | |
| Use time | It is time of "End date" and "Beginning date" of the use state. | |
| Number of use | It is a number of people that takes part in a conference. | |
| Total use time | It is time of the use of the total of the user who took part in a conference. | |
| Login history (Adhoc room) | ||
| [Get Logfile] |
Data of Adhoc meeting room information is available for download as csv file by clicking this link. Users can customize contents to view from usage history. Below, are the description of rows in the csv file (from left to right): NO.1: user name NO.2: name of conference room NO.3: login time NO.4: logout time NO.5: total length NO.6: IP address NO.7: client NO.8: connection method |
|
| [DownLoad detailed log] |
A detailed history is provided per Adhoc meeting room. Users can customize contents to view from usage history. Below, are the description of rows in the csv file (from left to right): NO.1: conference room name NO.2: usage start date and time NO.3: usage end date and time NO.4: length (minutes) NO.5: Individual user history user name, login time, logout time, IP address, length (minutes) |
|
| NAME | It is the name of the user that logged in the Adhoc room. | |
| Name of the room | Show conference room that was used. | |
| LOGIN | Show conference room logon date and time. | |
| LOGOUT | Show conference room logout date and time. | |
| LENGTH | Show conference lasting time. | |
| IP address | Show IP addresses of users that have entered the room. | |
| Client |
The types of connected client device are displayed. The types of devices are as follows: PC: Windows device Mac: Mac device Android: Android device iOS: iOS device Tel: telephone / Video conference device |
|
| Connection Method | The actual connecting method is displayed. | |
| Quality of Connection |
The connection quality during the meeting is displayed. |
|
To open a conference room customization screen, go to < Others > - < Advanced Settings >.
User may change setups on sharing, network, video/audio and so on.
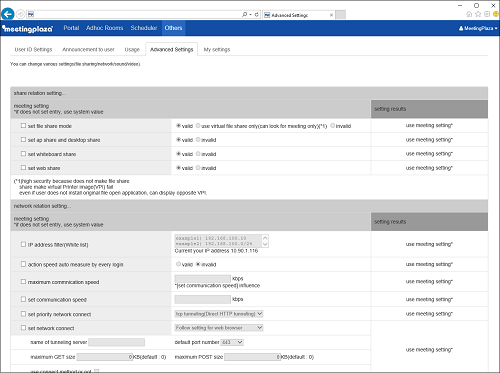
Conference room customization will affect all conference rooms. Customization on a particular conference room is not available.
MeetingPlaza Mobile does not support room customization.
Some features on MeetingPlaza for Mac does not support room customization.
Please put the checkbox ![]() of selected items of conference room customization on
of selected items of conference room customization on ![]() to make a change.
to make a change.
The following items are customizable items.
| share relation setting... | |
|---|---|
| set file share mode |
Set up file sharing. Default is set as [Valid]. |
| set ap share and desktop share |
Set up application sharing and desktop sharing. Default is set as [Valid]. |
| set whiteboard share |
Set up whiteboard sharing. Default is set as [Valid]. |
| set web share |
Set up web sharing. Default is set as [Valid]. |
| network relation setting... | |
| IP address filter(White list) | Set up IP address filter to authorize accesses of the conference room. |
| action speed auto measure by every login |
Set up network speed test each time at login. Default is set as [Invalid]. |
| maximum communication speed |
Set up maximum communication speed. This configuration will affect < Set Communication Speed >. |
| set communication speed | Set up communication speed. |
| set priority network connect | Set up priority network connect to [TCP Tunneling] or [Direct Connect]. |
| set network connect | Detailed network connect |
| audio + image relation setting... | |
| Reconfigure at start-up |
Set up voice dialogue each time at login. Default is set as [Invalid]. |
| setting microphone control | Set up the speak mode(microphone control) |
| set up echo cancel mode | Set up the echo canceller to strong or weak. |
| Noise cancel set up microphone mode | Set up the noise canceller, microphone to strong or weak. |
| Noise cancel set up speaker mode | Set up the noise canceller, speaker to strong or weak. |
| video quality change simple setting |
Set up the video quality. By doing so, user may change [Image Quality] at same time. |
| meeting login relation setting... | |
| reserve entrance | To set up device settings at entrance page for users to check operation in a reserved conference room. Default is set as [Valid]. |
| check operation meeting | Set up items to test before the conference starts such as network, voice and video. Default is set as [Valid]. |
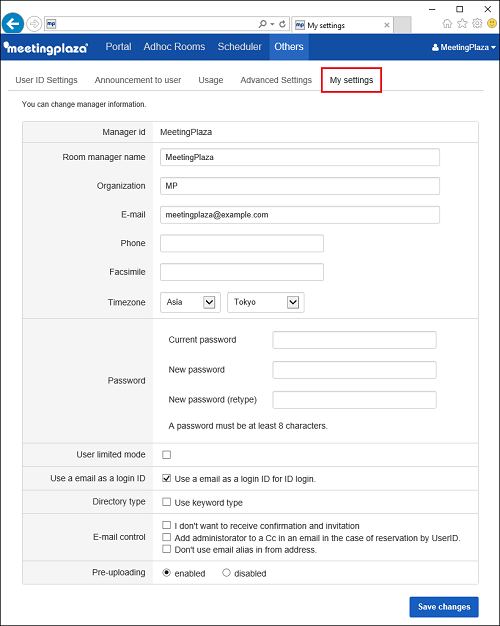
User may change email address or password, and change other configurations that are related to manager information.
| Telephone/h.323 | To allow telephone login, please check on this option |
|---|---|
| User limited mode | To switch user mode that enable conference room administrator to manage rooms, and enroll registered users to new meetings. |
| Use a email as a login ID |
Registered users may use their e-mail addresses as login ID. *A duplicated email address is not allowed as login ID. |
| Directory type | To use keyword type directory, please check on this option |
| E-mail control |
To stop receiving reservation confirmation or invitation email, please check on this option To allow the registered user to add conference administrator to the reversation email invitation, check on this option If no alias is allowed at email from: address, please check on this option |
| Pre-uploading | User may choose to enable/disable of pre-uploading files. |
Lecture room is a special meeting room to host a large number of users at the same time. "Lecture room" is included in enterprise ASP service package, or is available to users that have purchased "Lecture" Option at system sales.
In a regular conference room, the number of users to attend a meeting is limited to 128. This maximum number of users is extended to 10,000 while "Lecture" Option is enabled19 .
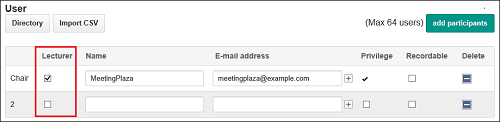
During a lecture while many users log into the meeting room, only the special user that is called "lecturer" has his thumbmail displayed. Non-lecturer users may have up to two persons speak at the same time. While non-lecturer users speak, their thumbnails are displayed to indicate their status. To register a "lecturer", please follow the following reservaction page to register up to 8 users in one meeting.
In the Lecture Room, only lecturer is allowed to share APPs, desktop or request questionnaire.
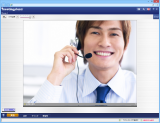
When you are not in the speak mode, your thumbnail is displayed as a static image. Your thumbnail becomes pink-framed and a video is activated while you start speaking.
 |
 |
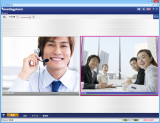 |
The participants are not in speak mode | In the screen, your thumbnail is displayed as static image | The frame of thumbnail becomes pink and video image is displayed when you are in talking mode. |
Attention:
To choose a lecture styled meeting room, user may do so at the time of meeting reservation or after creating a system regular conference room.
The "Seminar" option on meeting room page is unavailable to choose from (disabled).